Welcome to a journey into our Universe with Dr Dave, amateur astronomer and astrophotographer for over 40 years. Astro-imaging, image processing, space science, solar astronomy and public outreach are some of the stops in this journey!
The Veil Nebula is a cloud of heated and ionized gas and dust in the constellation Cygnus.
It constitutes the visible portions of the Cygnus Loop, a supernova remnant, many portions of which have acquired their own individual names and catalogue identifiers. The source supernova was a star 20 times more massive than the Sun which exploded between 10,000 and 20,000 years ago.
Supernovae can expel several solar masses of material at speeds up to several percent of the speed of light. This drives an expanding shock wave into the surrounding interstellar medium, sweeping up an expanding shell of gas and dust observed as a supernova remnant. Supernovae are a major source of elements in the interstellar medium from oxygen to rubidium.
At the time of the explosion, the supernova would have appeared brighter than Venus in the sky, and visible in the daytime! The remnants have since expanded to cover an area of the sky roughly 3 degrees in diameter (about 6 times the diameter, and 36 times the area, of the full Moon).
The area of the nebula pictured here, also known as NGC 6960, is the “western” portion. At the top of the image is the filamentary segment often called the “Witch’s Broom”. The image records narrowband signal from the 3 ionized gases: hydrogen alpha (red), hydrogen beta (blue), doubly ionized oxygen (teal).
Capture info: Location: SkyPi Remote Observatory, Pie Town NM US Telescope: Orion Optics UK AG14 (F3.8) Mount: 10 Micron GM3000 Camera: SBIG STXL 16200 Data: H-alpha, H-beta, OIII: 6.5, 6, 7 hours respectively Processing: Pixinsight
The entire Cygnus Loop imaged by the orbiting space telescope Galaxy Evolution Explorer or Galex which images the universe in ultraviolet wavelengths. The Eastern and Western Veil are the main portions which can be easily seen in the visible portion of the spectrum. (Courtesy Wikipedia).
The 3 “narrow band” filters used in the image were H alpha, H beta and Oxygen III or doubly ionized oxygen. These filters only allow a 5 nanometer segment of light to pass. Hydrogen alpha emits light in the red, oxygen in the green-blue and hydrogen beta in the blue. This accounts for the colors in the image.
Where is it? The Cygnus loop is in the region circled on the lower left. The constellation Cygnus (the swan) is easily recognized and is also known as the Northern Cross. It appears directly overhead during the Summer in the Northern Hemisphere. Right now you can see it there around 3am 🙂
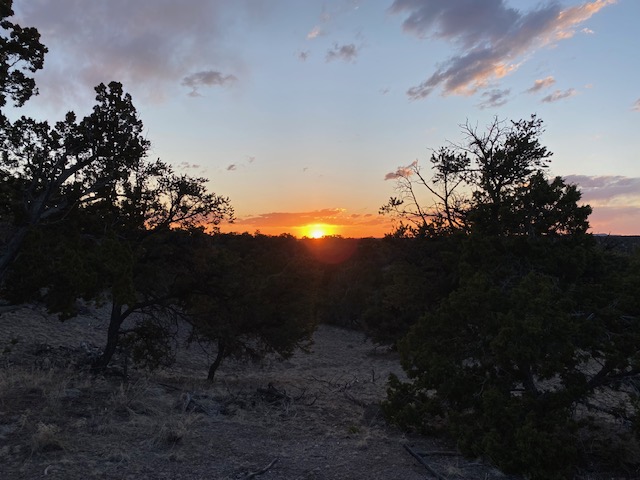
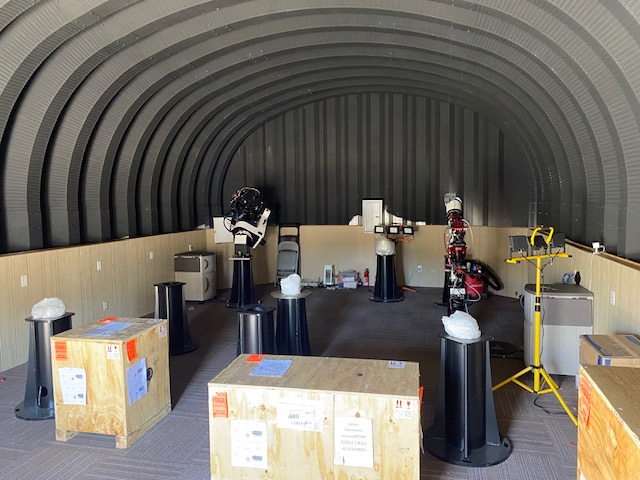
The Great Eclipse of 2024 is now over and it is time to return to Deep Space! We traveled back to the remote observatory in Pie Town NM to install a new camera system in Gamma Complex.
It’s a 4 hour journey into the most remote regions of the Southwest US. It has been about 6 months since I had to make any “service trips” up there.
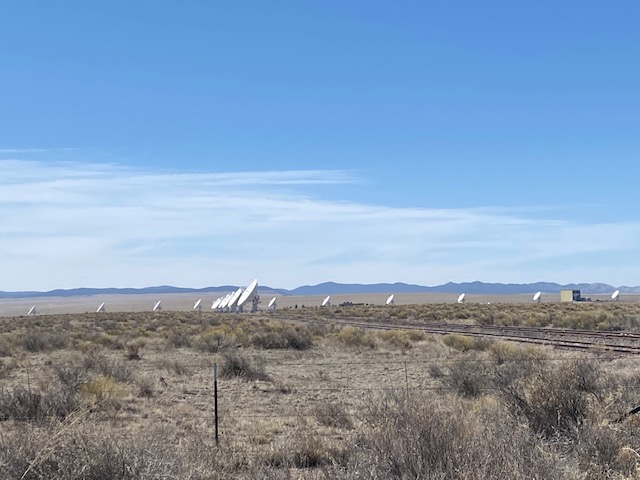
The VLA’s radio dishes stand at attention waiting for their next assignment!
Our travels take us across the San Agustin Plains, an area covering about 55 miles in width. The basin, created by a prehistoric lake, is bounded on all sides by various mountain ranges. One of driest remote places in the continental US, what else would one do out here except study the distant universe? The plains are home to the VLA (very large array), part of the National Radio Astronomy Observatory. Twenty -eight radio dishes each 25 meters in diameter make up the Y-shaped array. Arid climate is absolutely essential as water molecules will cause significant aberrations in radio signal.
SkyPi Remote Observatory entrance with the mathematical “Pi” logo and surrounding pinyon trees.
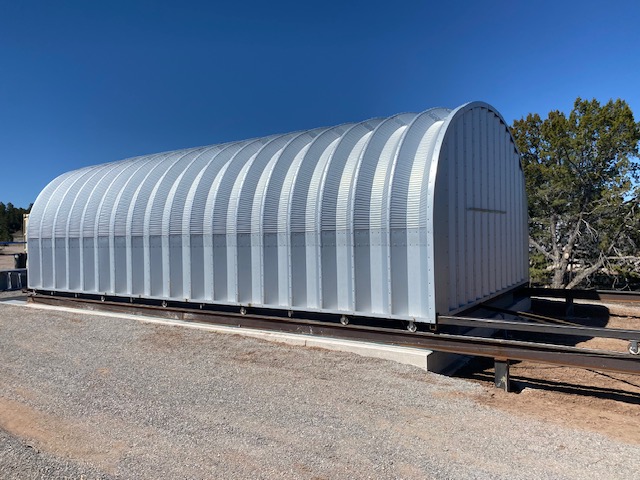
Another 60 miles west and we have arrived at our destination, SkyPi Remote Observatory, founded in 2012. The observatory complex is home currently to 5 roll-offs containing 8 telescope piers. They are named Alpha, Beta, Gamma, Delta and Omega (the owner has an aerospace background!). My equipment resides in Delta and Gamma. A 4-pier roll-off expansion is planned for the coming year.
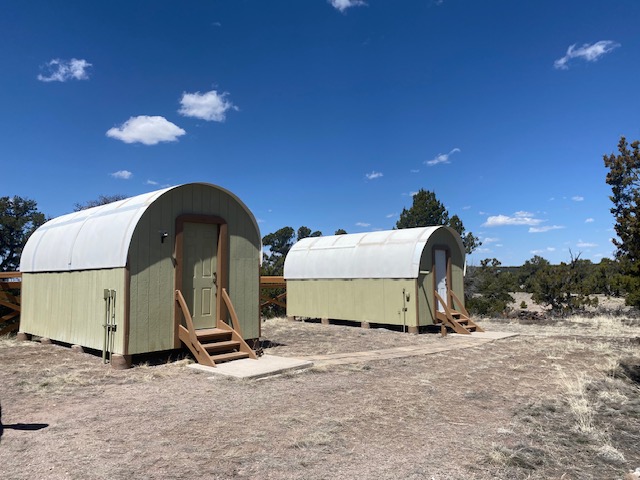
Two of the 5 roll-offs are shown here (Alpha and Beta). These roofs roll off to the west. You can barely see the tracks to the left.
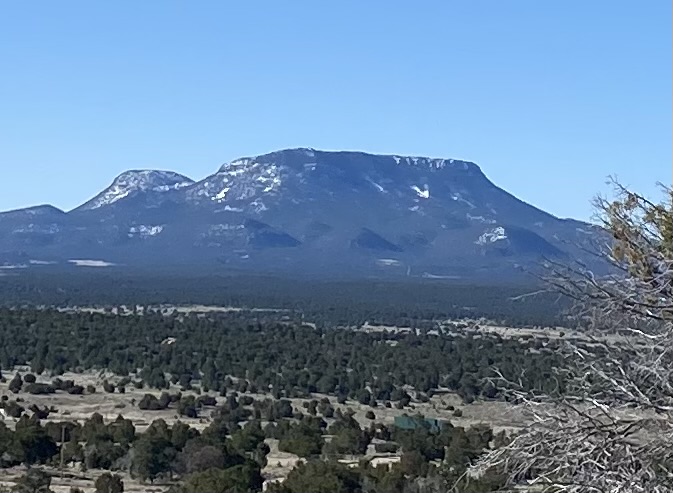
Eastern view from the observatory complex. Looks like the scene of an old western movie perhaps!
The walk or drive up to Gamma and Delta where my equipment resides. The pinyon or piñon pine tree grows in southwestern North America, especially in New Mexico, Colorado, Arizona, and Utah.
These trees have a very ethereal vibe to them, perfectly suited for an observatory site!
Outside of the observatories, it’s just you, the Pinyon trees and the Universe!
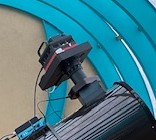
And now back to business here, the purpose of this trip is to replace our “old” CCD camera with a new CMOS version.
We’re replacing this CCD camera (about 6 pounds)
With this one (< 1 pound)!
We have discussed the whole camera technology changing over from CCD to CMOS in previous posts, but just to review, CCD (charge coupled device) and CMOS (complementary metal oxide semiconductor) image sensors are two different technologies for capturing images digitally. Both types of imagers convert light into electric charge and process it into electronic signals. CCDs and CMOS imagers were both invented in the late 1960s and 1970s. CCD became dominant initially, primarily because they gave far superior images with the fabrication technology available at the time.
However, with the promise of lower power consumption and higher integration for smaller components, CMOS designers focused efforts on imagers for mobile phones, the highest volume image sensor application in the world. This is what changed everything as the CCD market was quite narrow and limited to astroimaging and other science applications while CMOS technology could be applied to a huge global consumer market including smartphones, webcams, video surveillance etc. The CCD phase-out was thus inevitable.
An enormous amount of investment was made to develop and fine tune CMOS imagers and the fabrication processes that manufacture them. As a result of this investment, we witnessed great improvements in image quality, even as pixel sizes shrank and at this time, based on almost every performance parameter imaginable, CMOS imagers now outperform CCDs. As I commented before, this is one instance where cheaper IS actually better! Contemporary CMOS astroimaging cameras typically cost at least 50% less than their CCD predecessors.
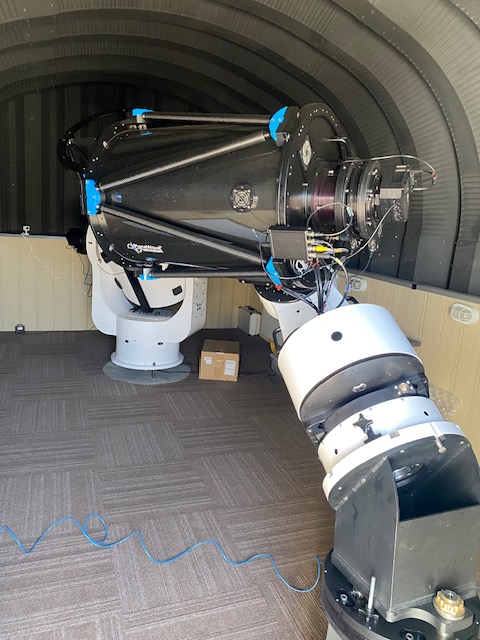
The mount’s torque motors go through a series of movements to measure the telescope’s balance i.e “front heavy” or “back heavy” so any necessary adjustments can be made. This enables a very precise correction to within 0.1 %
Replacing a camera system involves several steps including rebalancing the optical system, especially in this case as I had to remove a 40 pound counterweight after the install! Then the mount has to “relearn” how to point to objects in the sky after the weight and balance has changed. Finally a new “profile” has to be created in the control software to include the new camera and guider specs and the new image scale as the new sensors have different dimensions and pixel sizes.
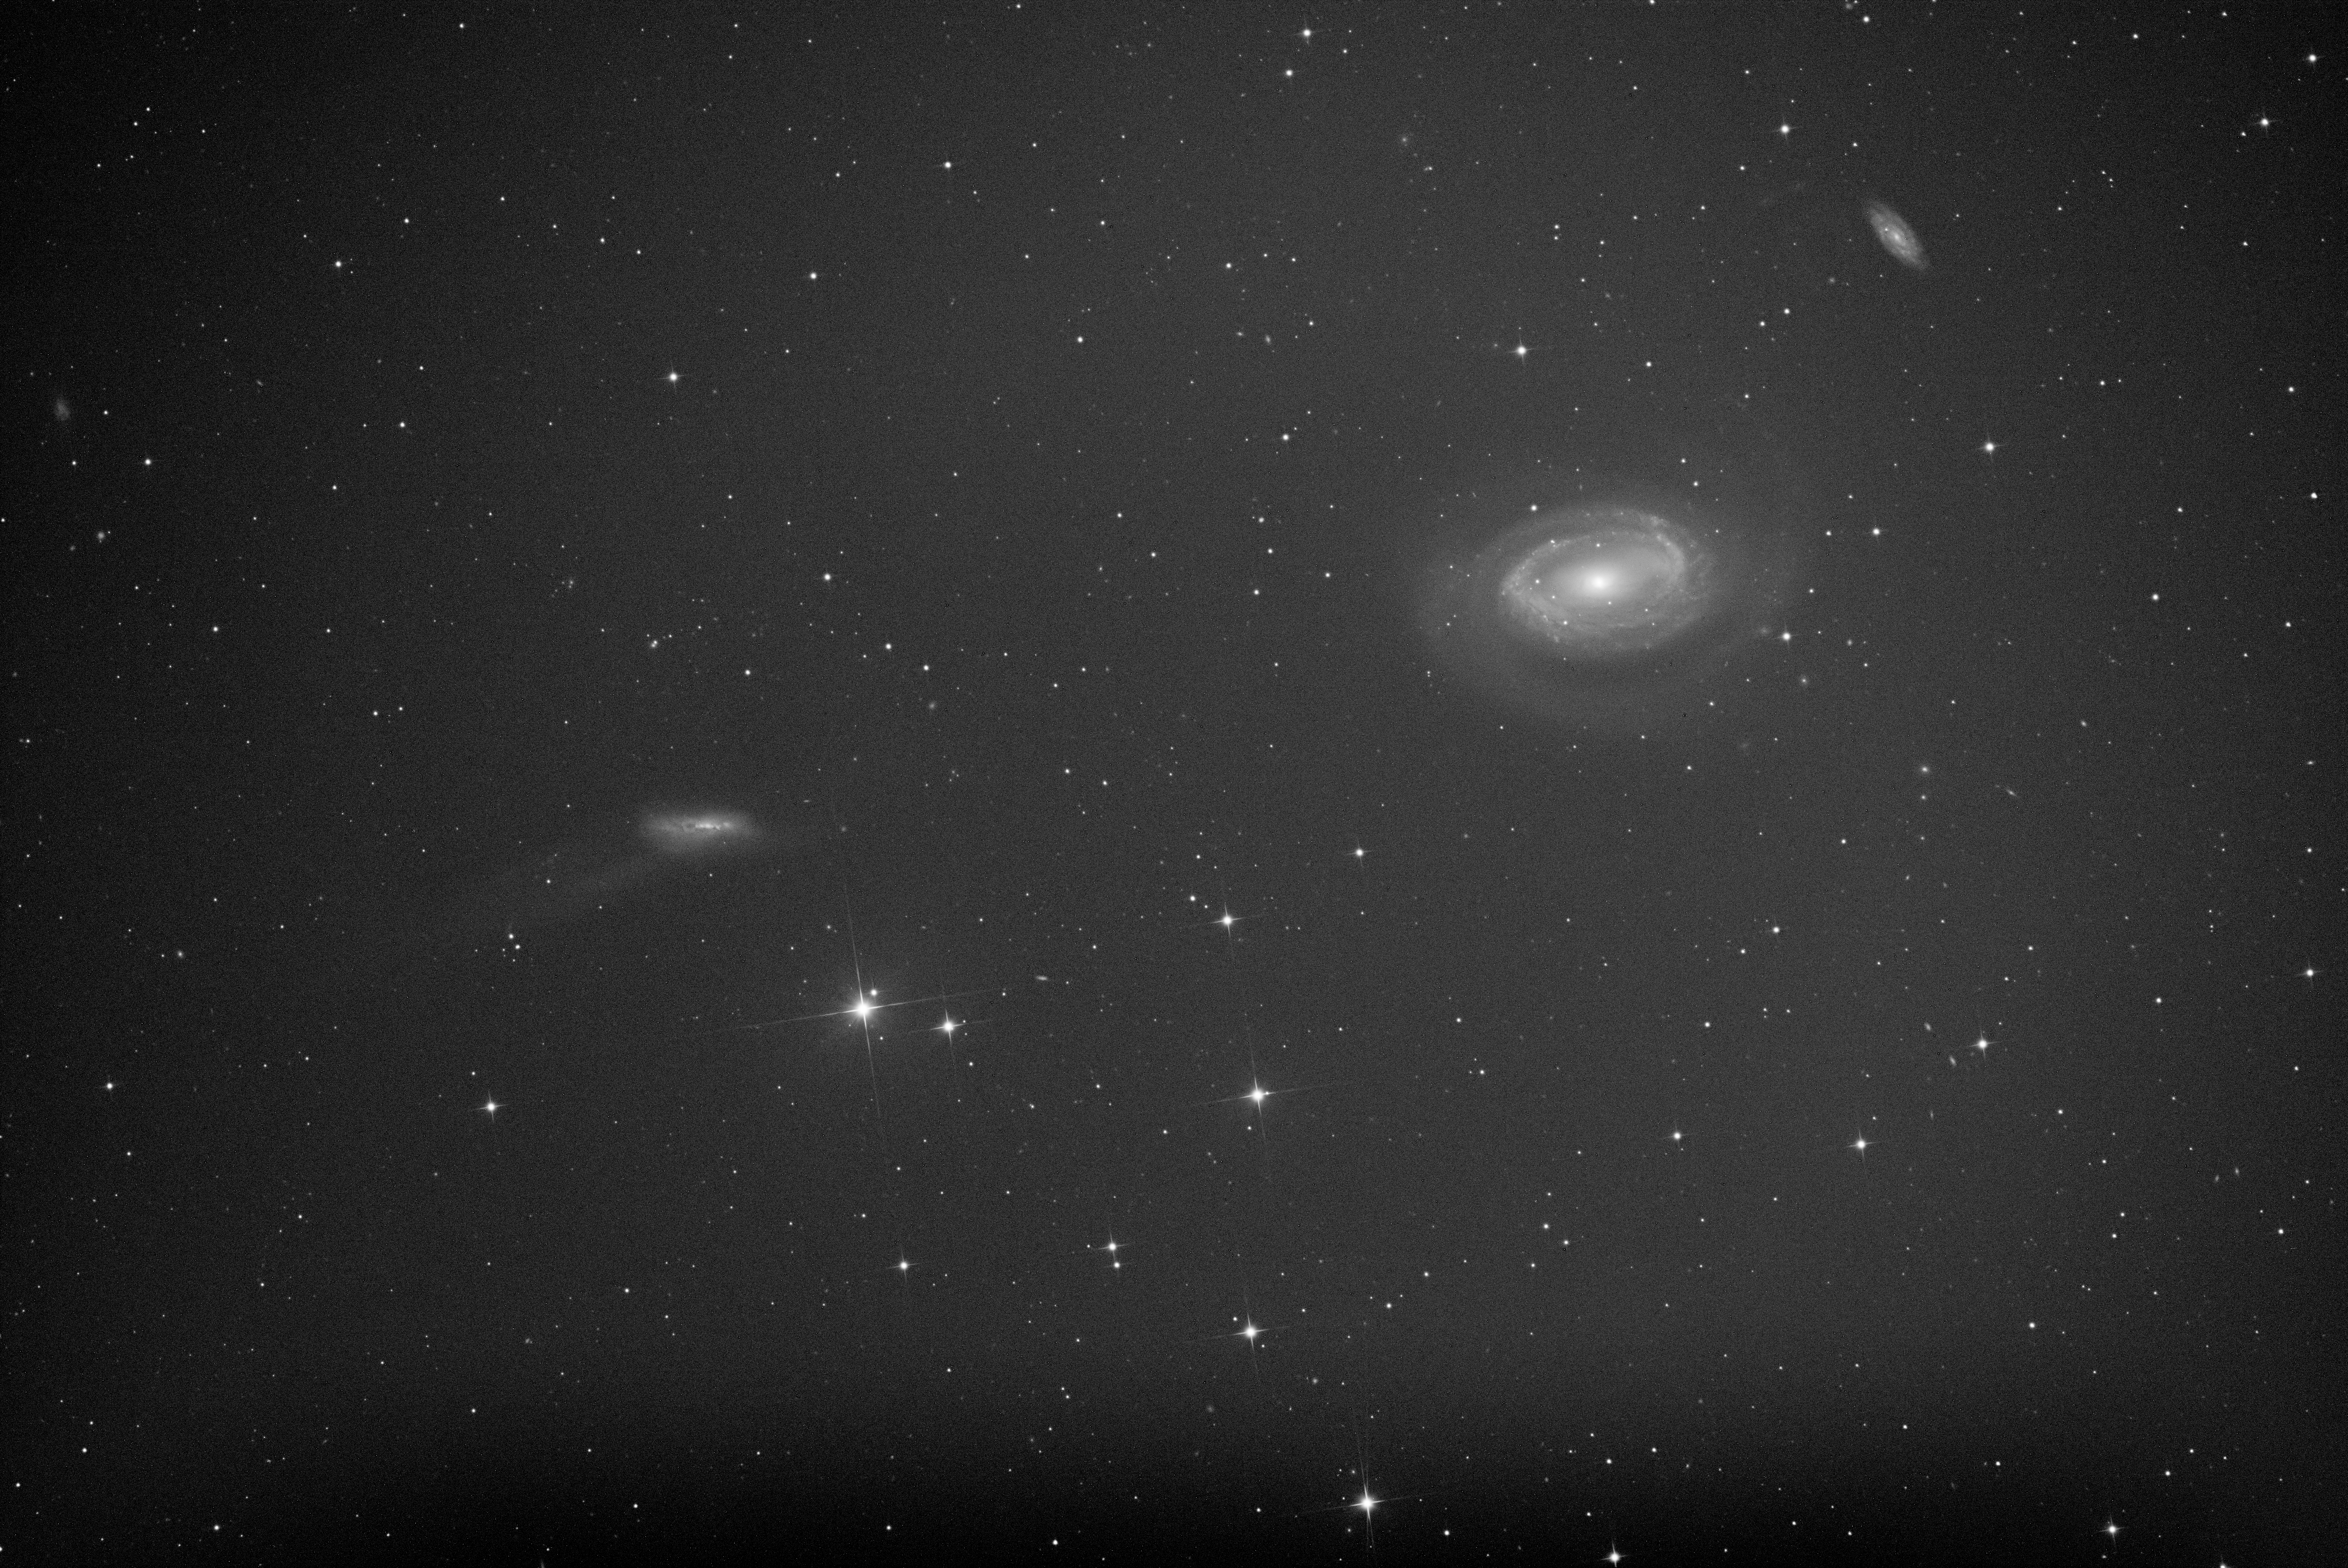
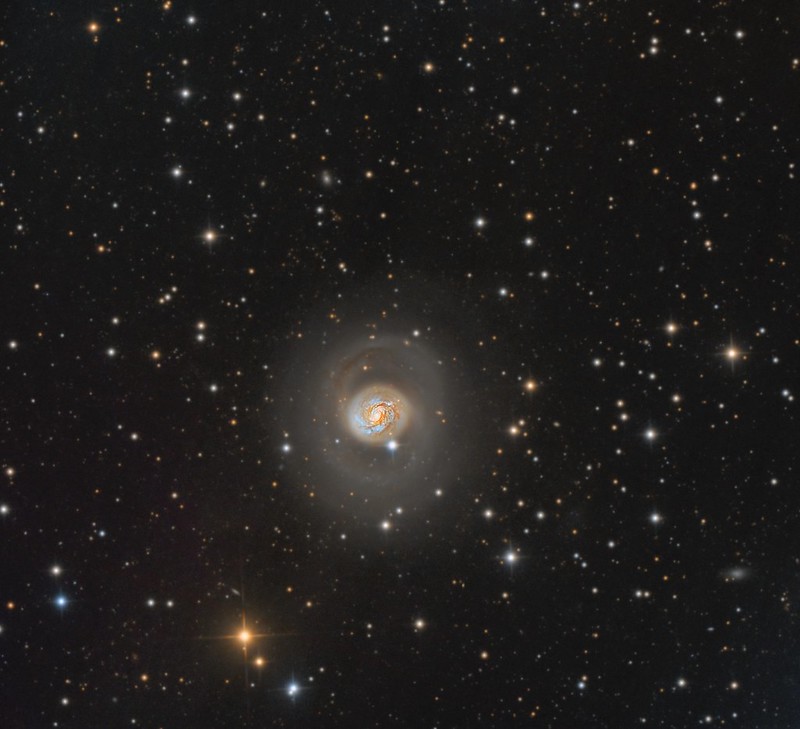
First light image with new camera system! This is a 5 minute raw uncalibrated image with a waxing gibbous moon. Annotated image. NGC 4725 is an intermediate barred spiral galaxy with a prominent ring structure, located in the northern constellation of Coma Berenices. A likely companion galaxy to the left is the irregular NGC 4747, also known as ARP 159. A tidal plume is seen emanating from the left edge. More on this group at the completion of the project!
The camera installation project took 3 days and 3 nights to complete but our “first light” image is very encouraging!
Multiple pier roll-off at the new HCRO observatory
Finally I visited a new observatory complex under construction just “over the hill” from SkyPi. “Howling Coyote Remote Observatories” is yet another telescope hosting facility with identical conditions to SkyPi but on a much bigger scale. Currently there are around 7 telescopes in 2 roll-offs but plans are in the works for around 50 or more piers!
Piers arranged inside the observatory at HCRO
A Planewave Delta Rho telescope at HCRO
And that sums up my recent service trip to SkyPi Remote Observatory !
NGC 1055 is an edge-on spiral galaxy located in the constellation Cetus . “Edge on” meaning the plane of the galaxy lies along our line of sight as opposed to “face-on”. Imagine looking at the edge of a dinner plate. This would be the edge on view. When you can see the whole round plate in front of you, as well as what’s for dinner :), this is the face on view.
The galaxy has a prominent nuclear bulge crossed by a wide knotty dark lane of dust and gas. The spiral arm structure appears to be elevated above the galaxy’s plane and obscures the upper half of the bulge. Discovered on December 19, 1783 by William Herschel.
A rough distance estimate for NGC 1055 is 52 million light-years, with a diameter of about 115,800 light-years, slightly larger than our own Milky Way (about 106,000 light year diameter). NGC 1055 has extremely active star formation and is a bright infrared and radio source. It is in a binary galaxy system with neighboring M77 (previously imaged- see below) and there are a few million light years between them. Unfortunately I could not quite get both galaxies in the same image field!
M77 above , the binary sibling of NGC 1055, is a barred spiral galaxy 47 million light years away in the constellation Cetus (The Sea Monster in Greek mythology but typically whale in modern times). Fitting for this galaxy because it belongs to the Seyfert class of galaxies, one of the two largest groups of galaxies that contain active galactic nuclei which are characterized by the presence of a supermassive black hole at the center. These are the most luminous sources of electromagnetic radiation in the universe and while most of the radiation is in the form of high energy xrays and ultraviolet, 5% of Seyferts, including this one, are also strong in radio emissions. This has been studied extensively by the VLA (Very Large Array), an array of radio telescopes right here in New Mexico and only about 45 minutes from my rigs in Pie Town! The strong radio source is designated “Cetus A”.
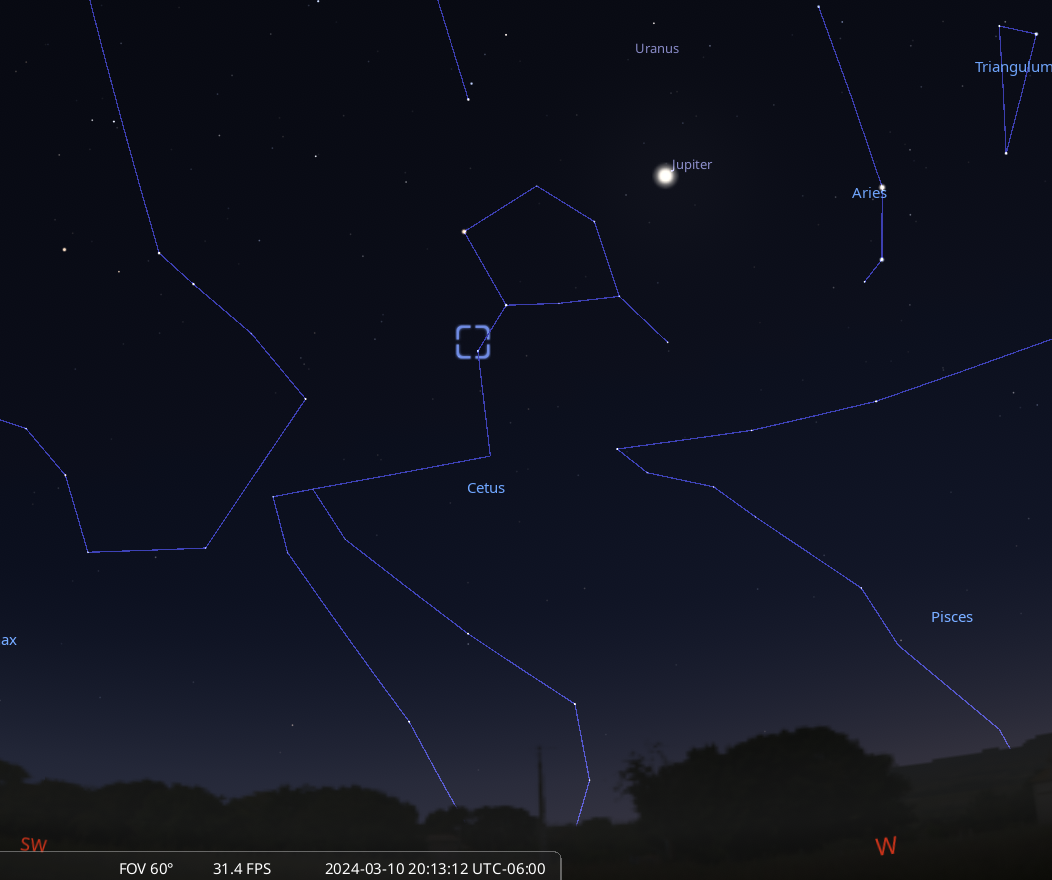
NGC 1055 is low in the Southwest at sunset here in the northern hemisphere (blue square). It is in the constellation Cetus, near the head of the whale. It is quite dim, near magnitude 11, so a large telescope is required to even recognize a faint smudge in the field of view!
And so we continue preparations for the April 8 solar eclipse in Ingram Texas! Before actually testing equipment we wanted to firm up a couple of important organizational items. First off is the actual official contact times for our intended location. We will update these when we get to actual site but there are potential timing “gotchas” that could happen in this case.
Number one is that here in the US we insist on changing clock times creating the annoying “Daylight Savings Time” vs “Standard Time”. This year daylight savings occurs on March 11, so clocks move ahead one hour. Number two is that we are going to be traveling to the observing site in the next time zone east of us so we will be technically in Central Daylight Time. Thankfully the calculated contact times are in Universal Time. However if you are using the “Eclipse Timer App” on your phone (to be discussed in a later post) and you load the contact times now, they will be off by one hour. You need to check another way.
“Universal Time” is mean time for the meridian at Greenwich, England (0° longitude), which runs through the former site of the Royal Observatory. It is based on the sidereal period of Earth’s rotation and is used as a basis for calculating standard clock time throughout most of the world. It is also called “Greenwich Mean Time”. All it means practically for us is we need to know how many hours west of the Greenwich Meridian we are going to be at to calculate the local times of the eclipse events.
On April 8 this year we will be in the Central Time Zone for the US which will be 5 hours west (EARLIER) than the Universal Time taking into account we will be in Central Daylight Time thanks to daylight savings!
So we need to know:
The real contact times we can expect
Where the Sun will be in the sky
Where the Moon will be coming from
Where on the Sun’s limb the photographic events are going to happen
When the Sun will cross the meridian
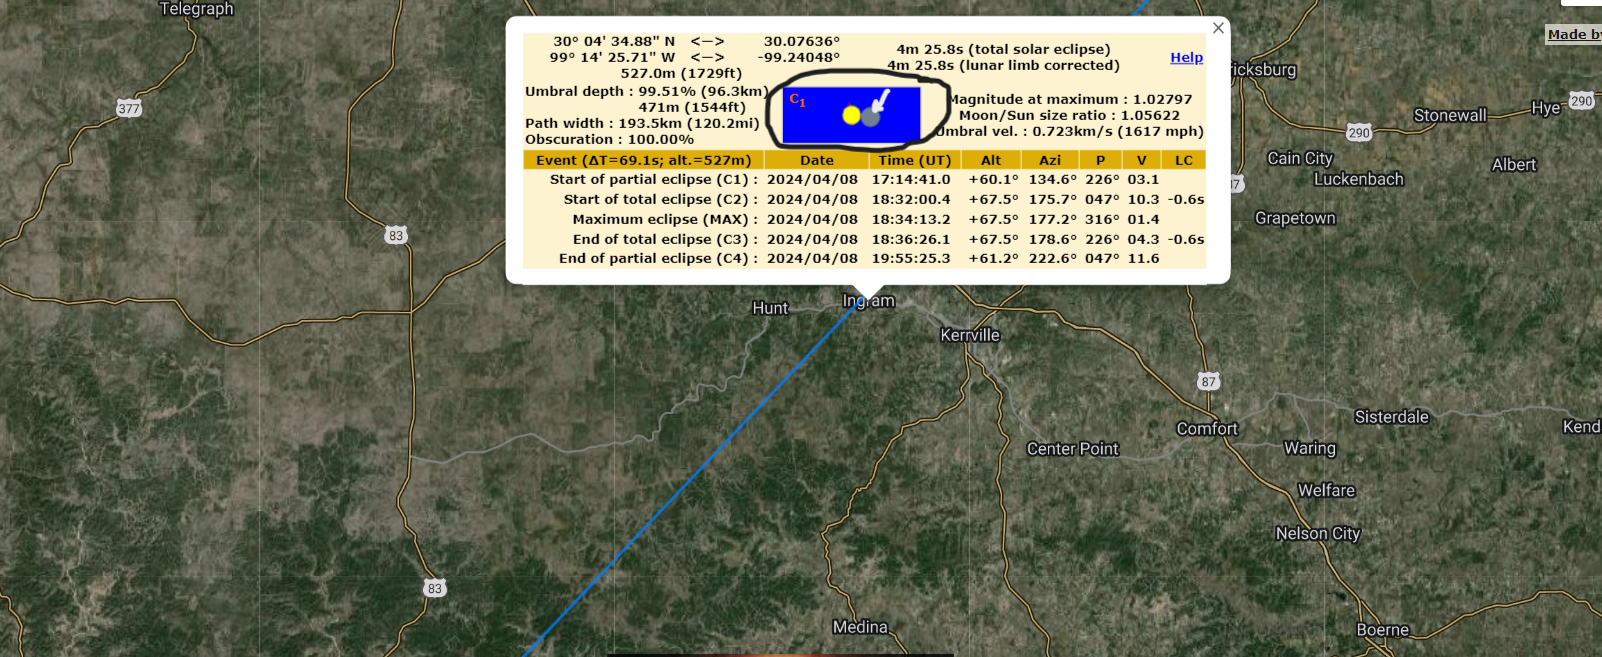
To do this we make use of this fantastic resource which is an Eclipse Interactive Google Map created by Javier M. Jubier.
First click on the eclipse to observe as shown above.
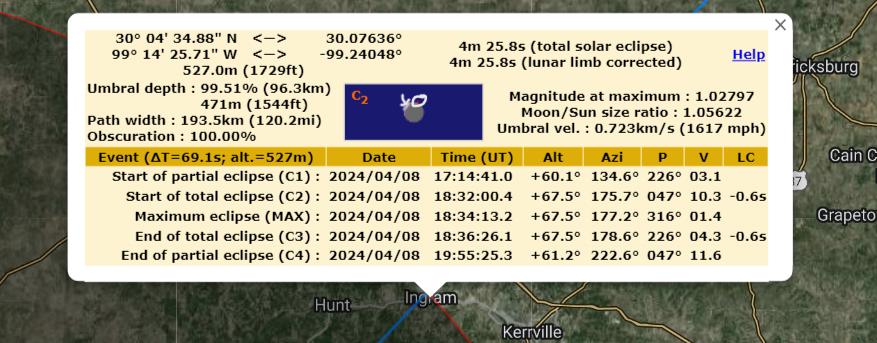
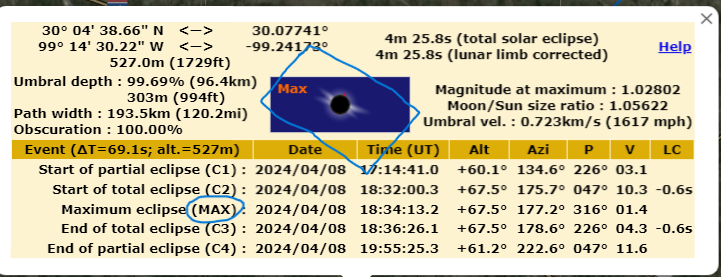
When you click on the eclipse date you are taken to the Google map. There you find your observing site and click on it. Like magic, the contact times are presented as shown! Just to review, ‘C1’ or First Contact is the beginning of the partial eclipse, when the Moon just starts to cross the Sun’s disc. You can see the Moon there in the graphic (white arrow) which is telling us the moon begins to cross the disc going from right to left.
Now looking at the times we see that the start of total eclipse ‘C2’ occurs at 18:32 Universal Time which would be 1:32 PM (13:32) local time, arrived at by subtracting 5 hours for our time zone.. This seems correct since our initial estimate was around 1:30 local time. The eclipse duration is around 4+ minutes, also correct.
So we now have confirmed the correct contact times and we also know which direction the Moon is coming from.
The above graphic shows the appearance of the sun at C2 which is the very beginning of totality, however the few brief seconds before complete coverage is when all of the events we want to capture will occur before the corona! This includes Baily’s Beads and diamond ring effect which we covered in an earlier post. The white arrow shows the simulated diamond ring which is happening in the left upper quadrant. The white circle surrounds a red tick mark in the graphic showing us where the solar north is going to be.
In this display above we can see that we will have to slightly rotate the camera (blue square) so the C2 events (and C3 at the end repeated) will be aligned centrally in the frame from left to right. Now you could also determine this when the partial phases begin and of course if it’s still rotated you can always correct this during processing 🙂 But it is helpful to know where you will be looking ahead of time.
If you click on any of the contact times in parentheses (circled above), this is actually a hyperlink that will take you the “Peak Finder” page displaying the location of the Sun with respect to the landscape. Now for us it’s not going to be that useful because we can already see the Sun will be very high in the sky (about 68 degress altitude). If you were planning a wider field view and totality was occurring more toward sunset let’s say, this could be very helpful.
Peak Finder page showing the Sun’s altitude at totality
Finally we are going to need at least a reasonable estimate of when the Sun will cross the meridian (basically highest point in the sky that separates east and west). We are going to be using a tracking (equatorial) mount and at some point after meridian crossing the mount will stop tracking until it gets “flipped” to the east side of the meridian so it can track west. If this happens mid eclipse that could be a major problem.
Above is a table of data from the US Naval Observatory that seems to indicate solar meridian crossing (also known as “transit”) will occur at 13.39 on April 8. This is 1:39PM. So it’s pretty close but probably not going to be a problem since totality is expected to end 3 minutes earlier. What we will have to include in our testing is how long the mount will track past the meridian. This will be very important!
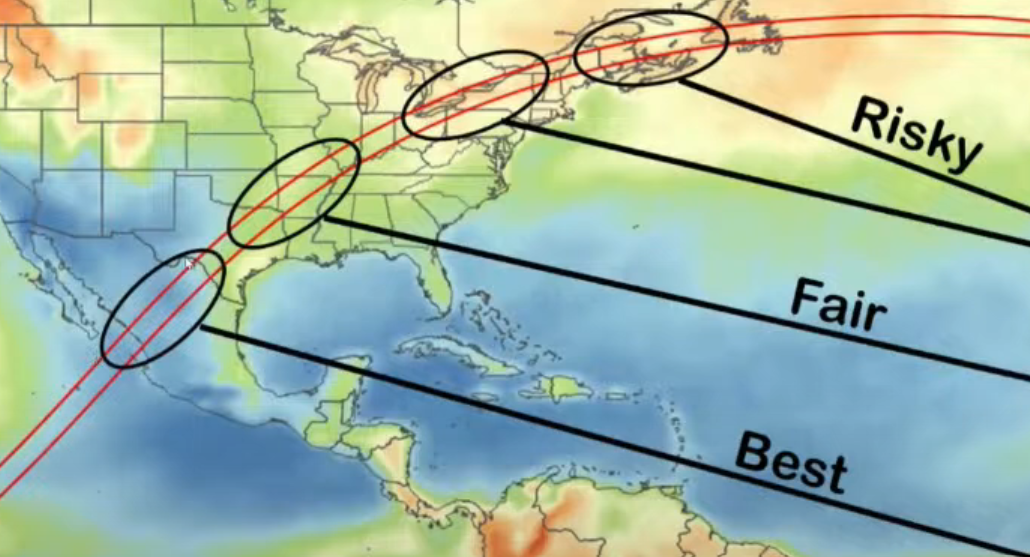
And finally just a rough weather projection which shows the eclipse path and chances of inclement weather on eclipse day. We will be on the lower end of “Fair” which means we have a slightly better that 50% chance of good weather. Because of the enormous crowds anticipated along the eclipse path, which contains several metropolitan areas, I will be somewhat skeptical of our chances to successfully relocate at the last minute but nothing will be entirely ruled out!
I believe all the preliminaries are in order so next is the actual equipment preparations!
M3, located in the constellation Canes Venatici, is a stellar marvel approximately 33,900 light-years from Earth. This globular cluster boasts a dense concentration of stars, with estimates ranging from 500,000 to over a million stars packed within a region spanning about 180 light-years.
At an estimated age of around 11.4 billion years, M3 predates many other celestial objects in its vicinity, including our own Sun. Its stellar population contains a diverse array of stars, from ancient red giants to younger main-sequence stars. Studying the chemical composition of these stars provides astronomers with valuable insights into the early stages of galaxy formation and the evolution of stellar populations over cosmic time.
M3’s position in the sky allows for detailed observations and analysis, making it a key target for astronomers studying stellar dynamics, stellar evolution, and the structure of globular clusters. By measuring the brightness and colors of individual stars within M3, scientists can infer properties such as stellar ages, masses, and chemical compositions, shedding light on the processes that govern the formation and evolution of stars within dense stellar environments. As researchers continue to unravel the secrets of M3, this globular cluster remains a beacon of discovery, offering a window into the distant past of our galaxy and the broader universe beyond.
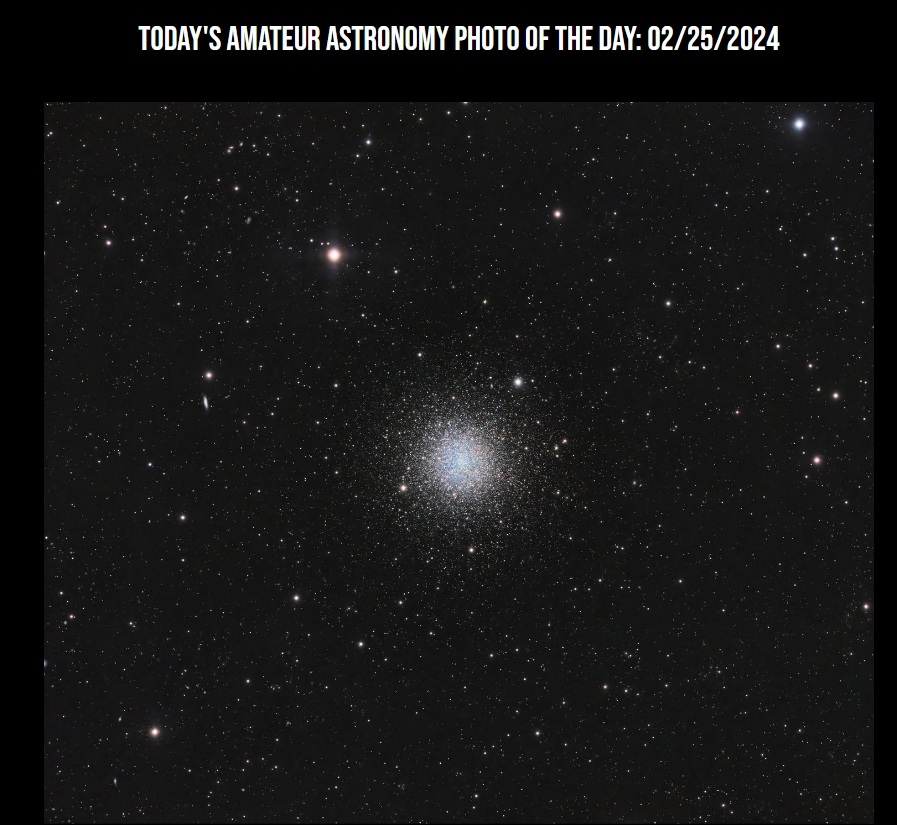
Not exactly a “new” image, but kind of reposted from my last entry. This was really a “test” first light image with a new portable set up shown below. This image was selected for today’s “Amateur Astronomy Picture of the Day”. https://www.aapod2.com/blog/plre1sthlc2gusplzd1rw26htoxmk5
Here I spend all this time and expense with these large remote rigs and it’s this simple set up producing remarkable images! What is most amazing to me is that this image was taken with a one shot color camera (no additional color filters. Basically like a regular digital camera except you can cool the camera down), in a fairly light polluted sky! (Bortle 5-6) The new CMOS (Complementary Metal Oxide Semiconductor) camera technology is leaving the traditional CCD (silicon based “Charged Couple Device”) in the proverbial dust! Believe it or not in this case cheaper is actually better. See this page for a more detailed explanation of CMOS vs CCD.
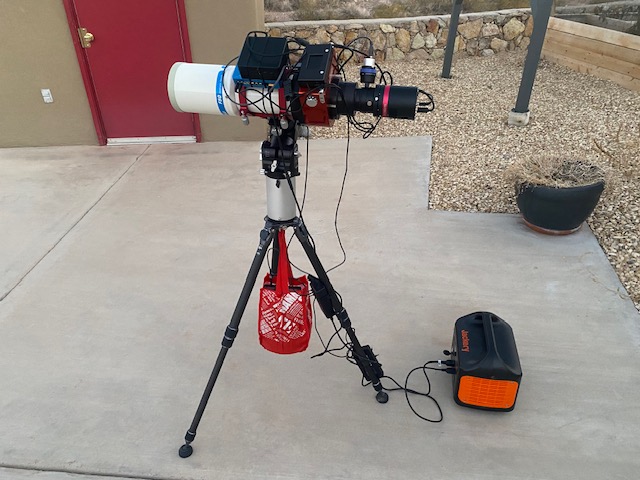
Equipment set up for the above image. Basically 4″ refracting telescope, color camera, mini PC attached and lithium battery on the lower right for computer and control hub power. The bag in the middle is 15 pounds weight to stabilize the tripod.
So take home message is current technology is making amazing things possible with modest investment!
We continue our preparations for the total solar eclipse of April 8, just over 2 months away now! So many details to sort through! The last eclipse of 2017 was my first and I recall many people told me not to bring equipment because you want to be able to observe all the events surrounding totality with your own eyes. “Don’t waste precious time fussing with imaging rigs because you will miss the whole thing”. Well of course I did not listen and brought the whole enchilada, telescope with heavy duty mount etc etc! Despite all that I got to witness everything completely stress free while I ran my telescope rig fully automated. You can read about that in the various posts on this site just by searching under “eclipse”. Preparation obviously is the key and can’t be stressed enough.
There are so many approaches to this and you can’t do it all so it’s best to decide what your goal is going to be.
Here is a list of the general imaging strategies:
Framing in close with long telephoto lens or telescope
Wide angle shots or panoramas
Time lapses which show the passage of the lunar shadow and changing sky colors
Rapid-fire stills or a movie capture the iconic“diamond rings” as the Sun disappears, then reappears from behind the Moon.
Composites blend all the stages of the eclipse onto one frame.
Movies
For myself I am still planning to focus on the events surrounding totality kind of like I did last time so we’re looking at number 1 in the above list. However this time I am also adding number 4 since last eclipse I kind of captured one frame of diamond ring only and it wasn’t that good. If I am really ambitious, maybe also number 5! 🙂
Now the “events surrounding totality” are those that occur from “second contact” or C2 through “third contact” or C3. At C2 the total eclipse begins. The Moon covers the last bit of the Sun’s bright photosphere, as the diamond ring effect is ending and complete totality begins. At C3 the total eclipse ends. Another diamond ring announces the end of the short 4 minutes of totality. Remember that from C2 to C3 you have to REMOVE filters for your photographs otherwise you won’t record anything! During the partial phases, technically C1 and C4, you have to use your filter if your optics are exposed during that time.
What are the phenomena we expect to image during totality?
Baily’s Beads. The Baily’s Beads effect is seen as the Moon makes its final move over the Sun. This effect occurs when gaps in the Moon’s rugged terrain allows sunlight to pass through in some places just before the total phase of the eclipse. The effect is named after Francis Baily, who explained the phenomenon in 1836. (image courtesy NASA)
Diamond Ring. The diamond-ring effect occurs at the beginning and end of totality. It’s the stage just before Baily’s Beads during second contact or just after during 3rd contact. As the last bits of sunlight pass through the valleys on the moon’s limb, and the faint corona around the Sun is just becoming visible, it looks like a ring with a “glittering diamond” on it. (image courtesy NASA)
Corona. The solar corona is of course the “holy grail” of eclipse photography! It is also the most compelling astronomical sight a human can witness (in my humble opinion!). It can only be seen during a total solar eclipse, unless of course you have special equipment such as that used by NASA or other institutions around the world. The corona is the outermost layer of the Sun’s atmosphere and extends millions of kilometers into space. It’s structure is quite variable and will be different for each eclipse you observe! (image courtesy NASA)
Ok so what did I learn from my last experience I can take into preparations this time around?
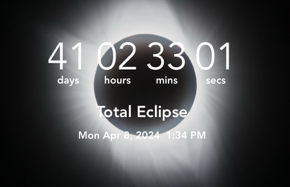
Take a close look at the header image at the top of this post, the one with the countdown superimposed on it. This was taken by me during the total eclipse of August 17, 2017 in Casper Wyoming. What do you see there? Yes I thought it was a pretty decent capture for a newbie eclipse photographer, except for one thing. The corona is cut off! I did not realize how big an area is covered by the sun’s corona. It can be easily a few solar diameters wide! The equipment I used was a 4 inch refracting telescope and standard dslr camera. The focal length was 800mm which is quite long and field of view was not that big and clearly not big enough to capture the whole corona.
So this time I will ditch the telescope and stick with a telephoto lens and full frame camera which should yield a field of view plenty big enough to get the whole thing!
The Sun first appears at the end of totality creating the “Diamond Ring” effect!
2. This was also an image I took back in 2017, but it was the only frame I got showing the diamond ring and I did not capture any of the Baily’s beads. Baily’s is a major challenge as the effect lasts for literally seconds, maybe 3-5! I used a technique called “tethered automation” meaning the camera was connected to my laptop and the automation program controlled the camera via the usb connection. I believe this limited the number of frames that could be taken during the very short time between the start of 2nd contact and full totality or end of totality and beginning of 3rd contact. This was probably only about 15-20 seconds or so. I believe that my full frame camera with blue tooth shutter will enable much higher frequency of frame capture. We will see in the coming weeks!
Just at the end of second contact, solar prominences can be seen!
3. The above image is the best one I took in 2017. After Baily’s beads, 2nd contact, moments before full totality I was able to capture solar prominences! A solar prominence (also known as a filament when viewed against the solar disk) is a large, bright feature extending outward from the Sun’s surface. Prominences are anchored to the Sun’s surface in the photosphere, and extend outwards into the Sun’s corona. Looking back at my experiences in 2017, I would say the ONLY advantage of using a telescope would be if you wanted to focus on this particular feature during the eclipse. Telephoto images can pick this up occasionally but not nearly as detailed.
So where do we go from here? Of course testing, testing and more testing including equipment, software, set up etc.
Just a couple of preliminary points before closing. The annular eclipse I observed back in October was a special case of an extended partial eclipse so for that I had to keep the camera filtered for the duration. This was a threaded filter I screwed on to the lens and just left it on. For complete totality though you will have to be able to remove the filter quickly in order to capture the events during totality. A threaded filter is not going to work!
Solar filter from Kendrick Astro Instruments. This has a built in solar finder! (top)
I recently obtained a solar filter from Kendrick Astro Instruments to fit over my telephoto lens. Kendrick is a well known Canadian company, been around for years. The filters are light weight, easily slipped on and off. They also have a built in solar finder! Genius!
Solar filter positioned over the lens. 3 nylon thumb screws stabilize it.
The image above shows the filter in place. Good news this time the eclipse occurs around 1-1:30, so the lens will be pointed upward, making it possible to leave the screws a little loose. This way the filter can be rapidly removed for go time!
And finally if you are planning for this don’t struggle looking for information in a million places online. Get this ebook written by eclipse photographer Alan Dyer. It is indispensable!
Thanks for hanging in there this time! Took a little longer than anticipated.
The “Ghost Nebula” (designated Sh2-136, VdB 141) is a reflection nebula located in the constellation Cepheus.
The VdB catalog was originally published in 1966 by Sidney van den Bergh and contains 159 reflection nebulae. Reflection nebulae are clouds of interstellar dust which might reflect the light of a nearby star or stars. The energy from the nearby stars is insufficient to ionize the gas of the nebula to create an emission nebula, but is enough to give sufficient scattering to make the dust visible.
The “Ghost” lies near the star cluster NGC 7023. There are several stars embedded, whose reflected light make the nebula appear a yellowish-brown color giving it the eerie “ghost-like” appearance. The surrounding region is filled with interstellar dust and gas. The Universe is a very dusty place. Cosmic dust consists of tiny particles of solid material floating around in the space between the stars. It is not the same as the dust you find in your house but more like smoke with small particles varying from collections of just a few molecules to grains of 0.1 mm in size.
Capture info for the above image:
Location: SkyPi Remote Observatory, Pie Town, NM US Telescope: Orion Optics UK AG14 F3.8 Mount: 10 Micron GM3000 Camera: SBIG STXL 16200 Data: LRGB 7,6,5,6 hours respectively Processing: Pixinsight
The Ghost is located in the constallation Cepheus. Shown above, it is marked by the red square at the center of the image.
That’s all for now! Next up, we will continue our eclipse preparations.
Messier 74 (also known as NGC 628 and Phantom Galaxy) is a large spiral galaxy in the constellation Pisces. It is about 32 million light-years away from Earth. The galaxy contains two clearly defined spiral arms that wind counterclockwise from the galaxy’s center. The spiral arms widen as they get farther from M74’s center, but one of the arms narrows at the end. This is a typical example of a “Grand Design” spiral galaxy.
Why is it called the Phantom Galaxy? This is because in an amateur sized telescope it is barely visible to the eye. It has an extremely low surface brightness, somewhat of a ghostly appearance. Hence the name “phantom”.
Many spiral galaxies have bluish spiral arms, which is because these are regions of active star formation, typically higher energy. The pink areas are known as “HII” regions. HII regions are emission nebulae created when young, massive stars ionise nearby gas clouds with high-energy UV radiation. They are composed primarily of hydrogen, hence the name (astronomers use the term HII to refer to ionised hydrogen, HI for neutral hydrogen), and have temperatures of around 10,000 Kelvin.
M74 location in the Northern Hemisphere (white square). As of now it is in the Southwest at sunset in the constellation Pisces, just south of Jupiter which is not shown on this map.
This is the rig used for the M74 image. The equipment consistes of: Officina Stellare RiDK 400mm scope, SBIG STX 16803 camera with self guiding filter wheel , Reginato Rotofocus V3 focuser rotator, Paramount ME II mount with encoders.
I think we can put it to bed now. Looks like it did burn up during perihelion but there does remain a “ghost” of sorts that is continuing to be examined by the orbiting observatories, including Hubble.
This is the topic that’s dominating the astronomy newswires these days as the much hyped up comet ISON reached perihelion (closest approach to the Sun) yesterday. Even I thought it was completely fried as it approached the Sun and just about everyone was calling it a done deal, when somehow something emerged from the other side! Apparently there is something that certainly looks like a comet, perhaps a fragment of the original but comet..esque just the same! Many unknowns still at play so stay tuned!