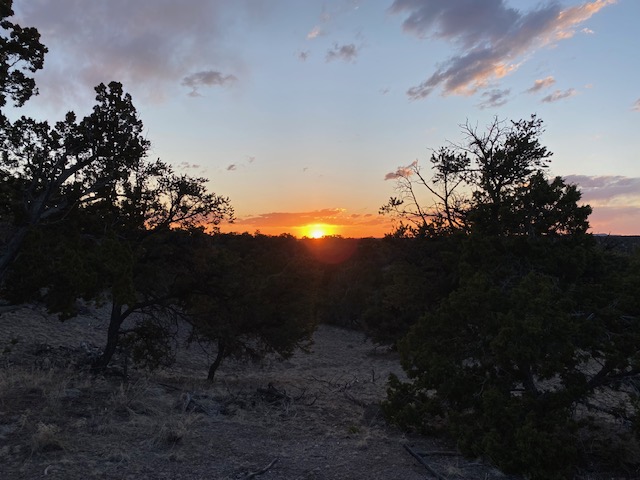
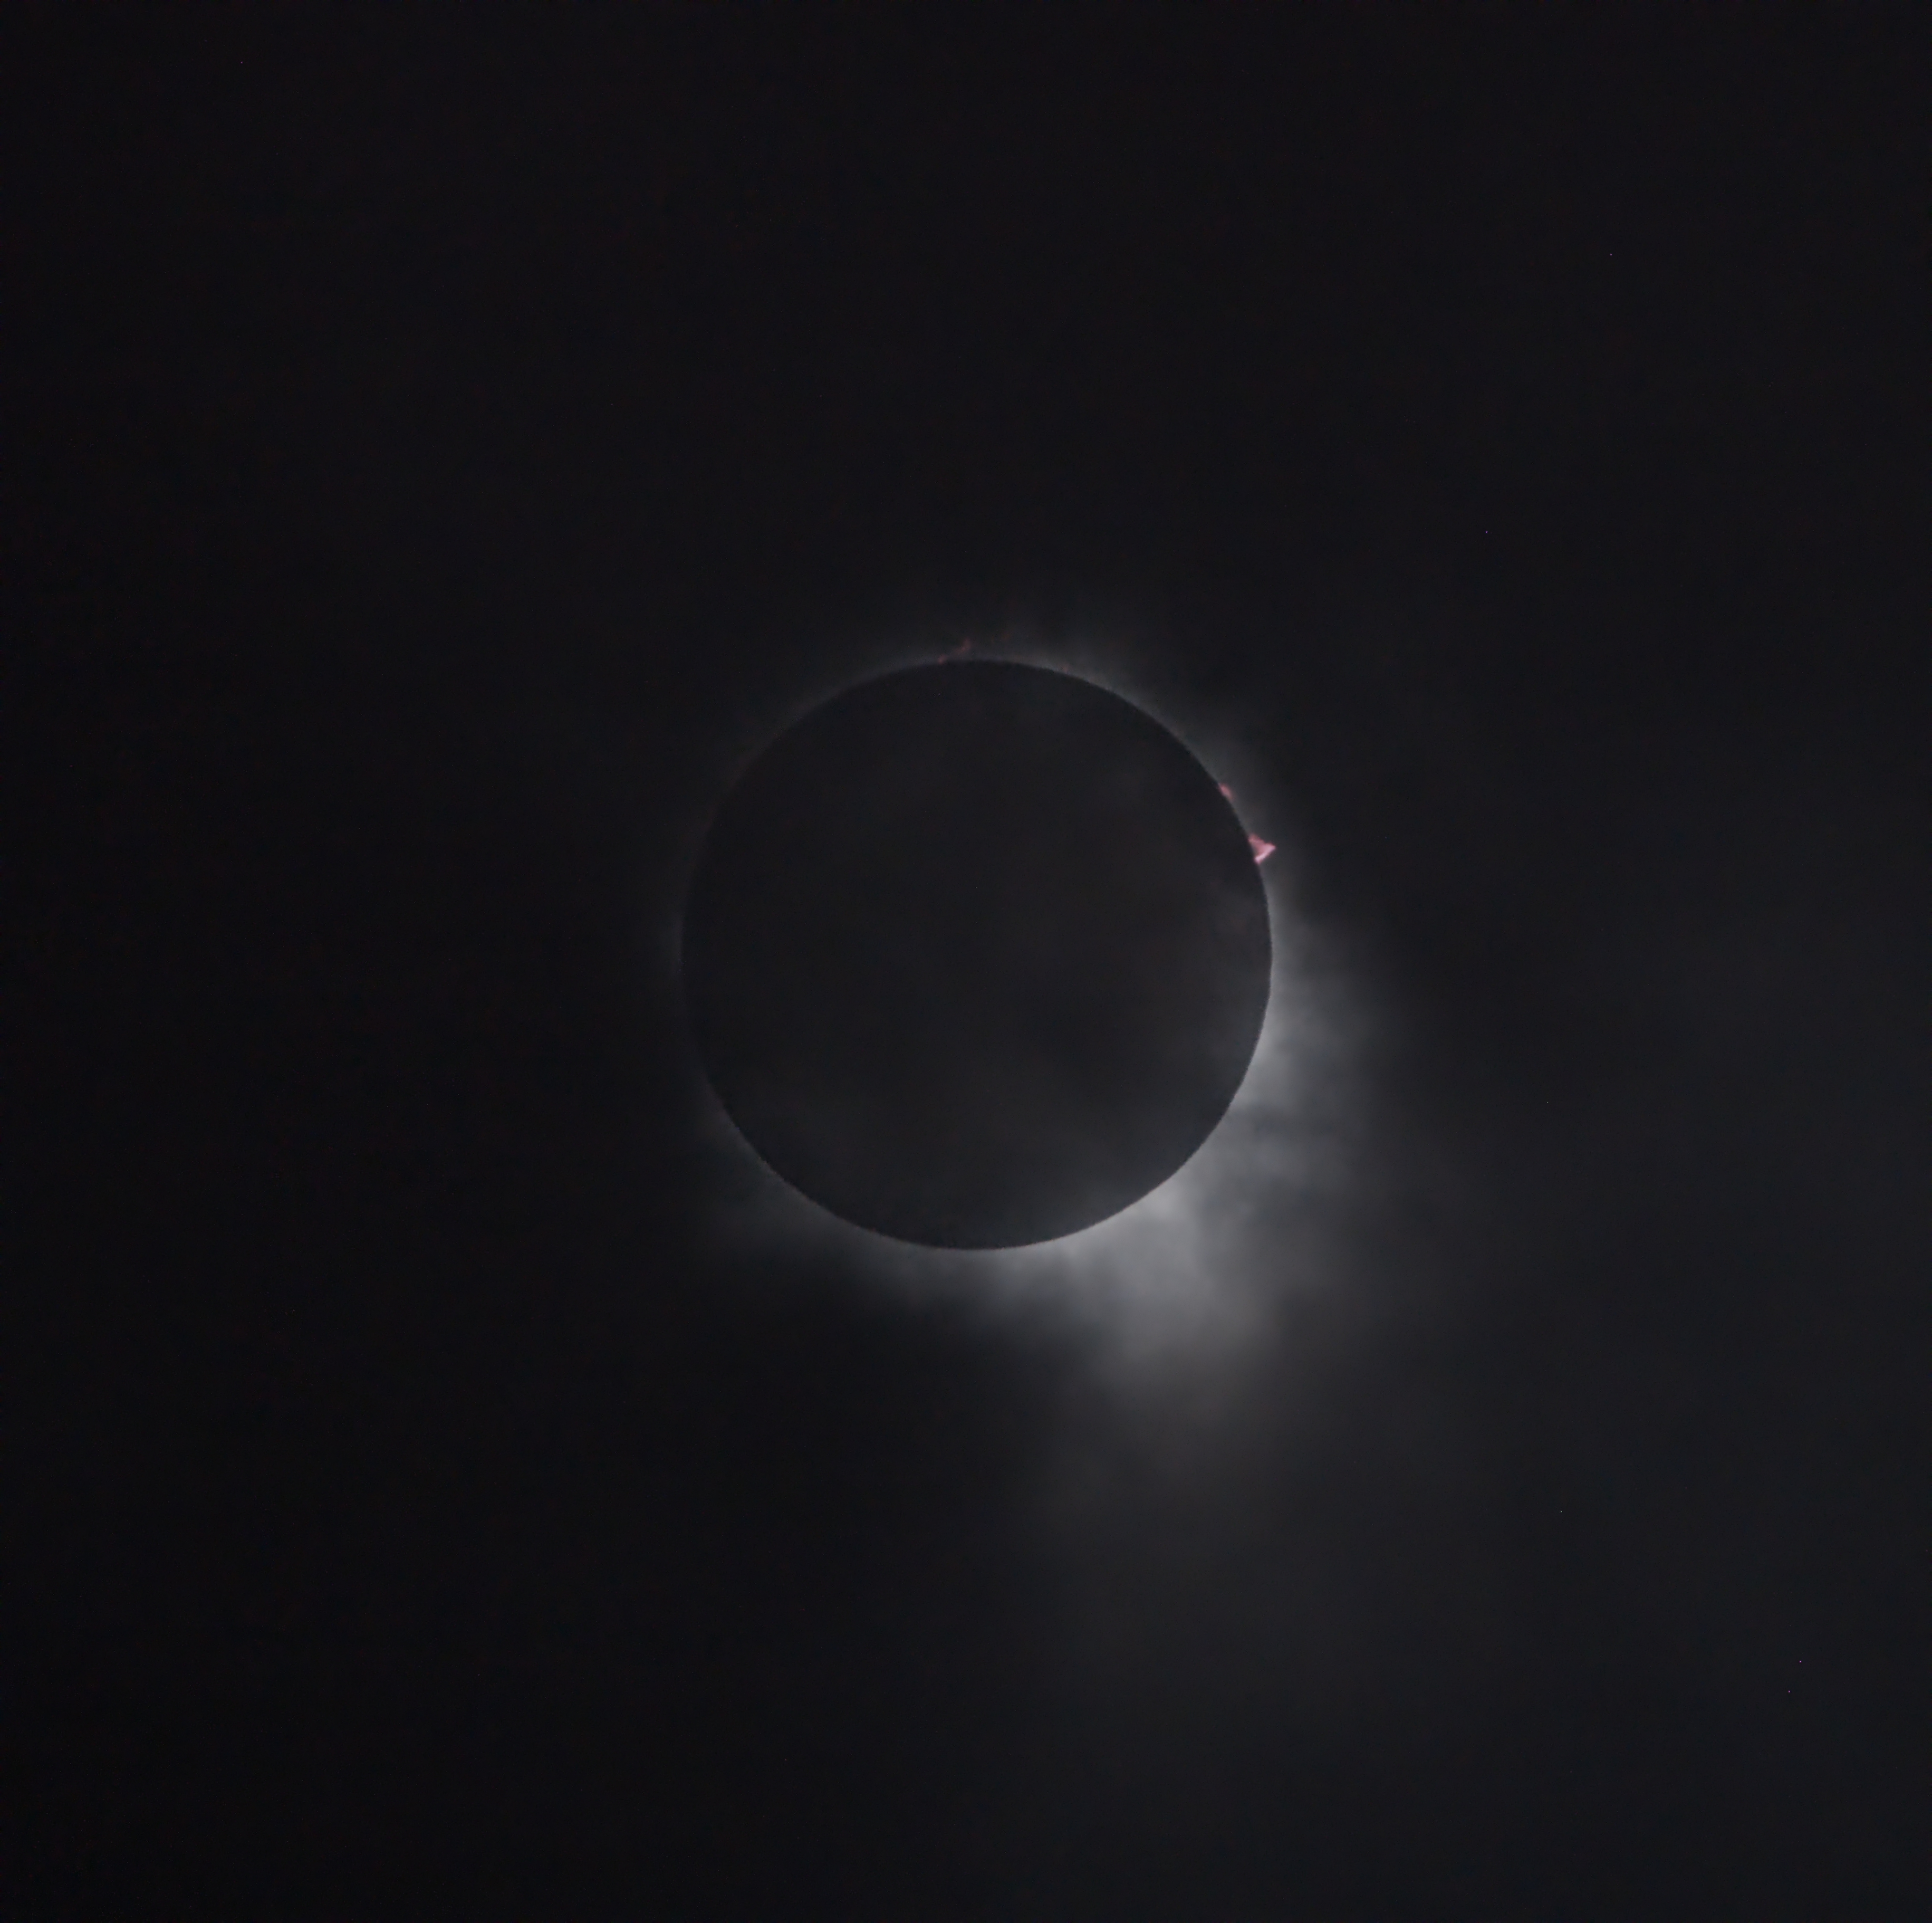
Outside of a couple of visits to eclipses and the Venus transit back in 2005 I think it was, I have very little experience with dedicated portable imaging equipment. I have been very spoiled having permanently installed imaging platforms I can run remotely and have been doing that for years. However now that I am fully retired, my wife and I purchased a comparatively small RV that among other planned destinations include a number of the darkest spots in the US. They all happen to be right here in the desert Southwest!
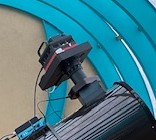
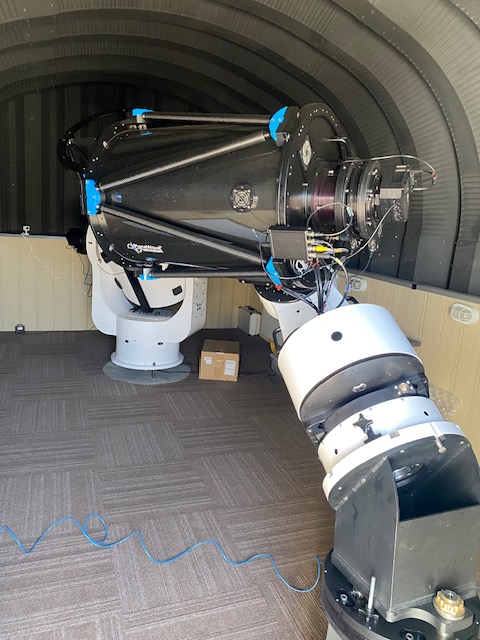
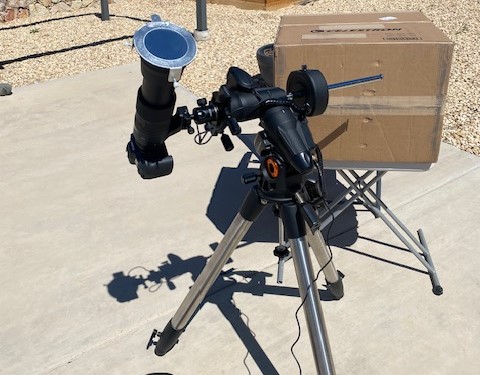
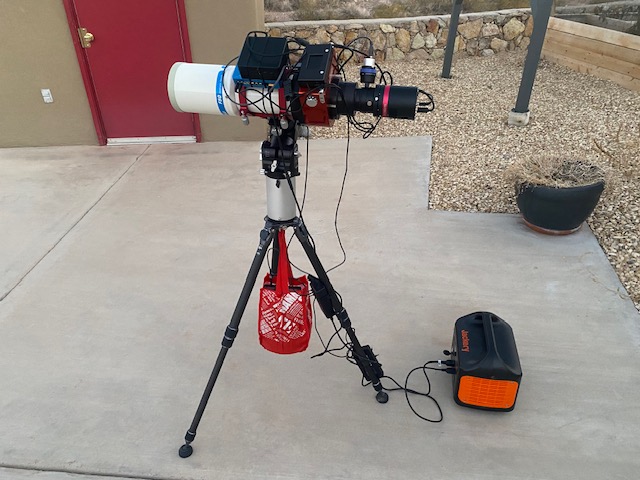
Of course I plan to take full advantage by employing a number of portable setups. The one pictured above is probably the most compact and lightweight for telescope gear. It is probably the latest technology for “grab and go” full imaging rigs.
Let’s examine the components!
Setting up an efficient portable platform is in some ways more challenging than a permanent rig. If you’re traveling to a dark site it will be quite remote which means there are no services. You will need some kind of power source. In this situation less is a lot more. Your camera, focuser, mount and computer all require power, not a ton but they will need it from somewhere.
At least one component to run properly requires AC power via an adaptor. In my case there are 2. The Pegasus “power box” (labeled ‘Peg’ in above image) manufactured by Pegasus Astro is an excellent portable 12volt power source and hub for usb devices. The Intel nuc 11 is a mini PC which weighs about 1 pound. Several more contemporary mini-PCs are able to run off of 12 volts. Unfortunately this is not one of them. The nuc 11 requires 19 volts which means I have to use the AC adaptor.
Ok so how do you use the computer if you don’t have a monitor connected to it? You have to connect into it via a wireless network. If you are at home and you have wireless internet this is fairly easy to do. If you are going to a dark site you will need to have some sort of mobile wireless service. There are several options. If you are camping for example you can remote into the telescope PC with another laptop, tablet or even smart phone.
For AC power there are a number of portable power options. There are now portable lithium batteries than can conveniently power AC equipment. The one I use is made by Jackery
The camera (labeled ‘C’) is a QHY268C color CMOS camera. As I am discovering the new CMOS sensors are proving to be much more sensitive than the traditional CCD sensors. A “one shot color” camera is well suited for portable rigs as it obviates the need for additional filter wheels which can add significant weight, and weight is a major concern for ultra-portable set-ups.
And now the most important component to discuss is the mount. This is labeled “RST” above, This is the Rainbow Astro RST 135E “weightless” mount meaning it is designed to operate without counterweights. Instead of worm gears, a new type of reducer called strain wave gear (harmonic drive) is used. Almost no backlash and no maintenance is required. As it is widely used in industrial robots, it is very durable. Many versions of this type of mount are available now. The RST was one of the first. However, there is a trade-off of course! The maximum weight capacity is 30 pounds, so you have to carefully weigh every ounce!
The mount is powered by a small lithium battery that can be stowed in the bag shown at the top. It supplies 15 volts of power.
The telescope is a Takahashi FSQ106N (4″ refractor). This is the original version of the popular 106 model that was introduced around 2004. Thankfully it’s a few pounds lighter than contemporary 106’s.
Other labeled components are ‘O’ which is the “off axis guider”. This device is basically a tiny prism that deflects a small portion of the incoming light to a guide camera “G”. And finally ‘D’ is a filter drawer that can accomodate a filter for narrow band imaging.
The whole package weighs approximately 22 pounds!
This is a very important equipment detail which is the “polemaster” camera shown pointing toward us, actually pointing at the celestial pole which for my residence is about 32 degrees north. As this is a portable system, every time you set up you do have to align your mount to the celestial north so it can track properly. The Polemaster uses a super-sensitive wide-field imaging camera that’s mounted on the RA axis of your mount. The RST conveniently has a Polemaster adaptor built into it. The camera in the PoleMaster images the region around Polaris (the North star) in real time, detecting Polaris itself as well as the fainter nearby stars. Using the positions of these stars, PoleMaster determines the position of the north celestial pole and compares it to the mount’s RA axis of rotation. Polar alignment is now a simple matter of moving the two centers of rotation so they overlap. This process takes about a half hour.
I have found that the tripod alignment can remain stable over several nights provided wind is no more than about 15 mph.
A hook underneath the mount allows for placing additional weight to stabilize the carbon fiber tripod. The tripod itself has a 50+ pound capacity. I have placed 15 pounds of weight in this bag. The mount battery can be stored in there as well.
Ok that’s all fine, but now what about the performance of all this?
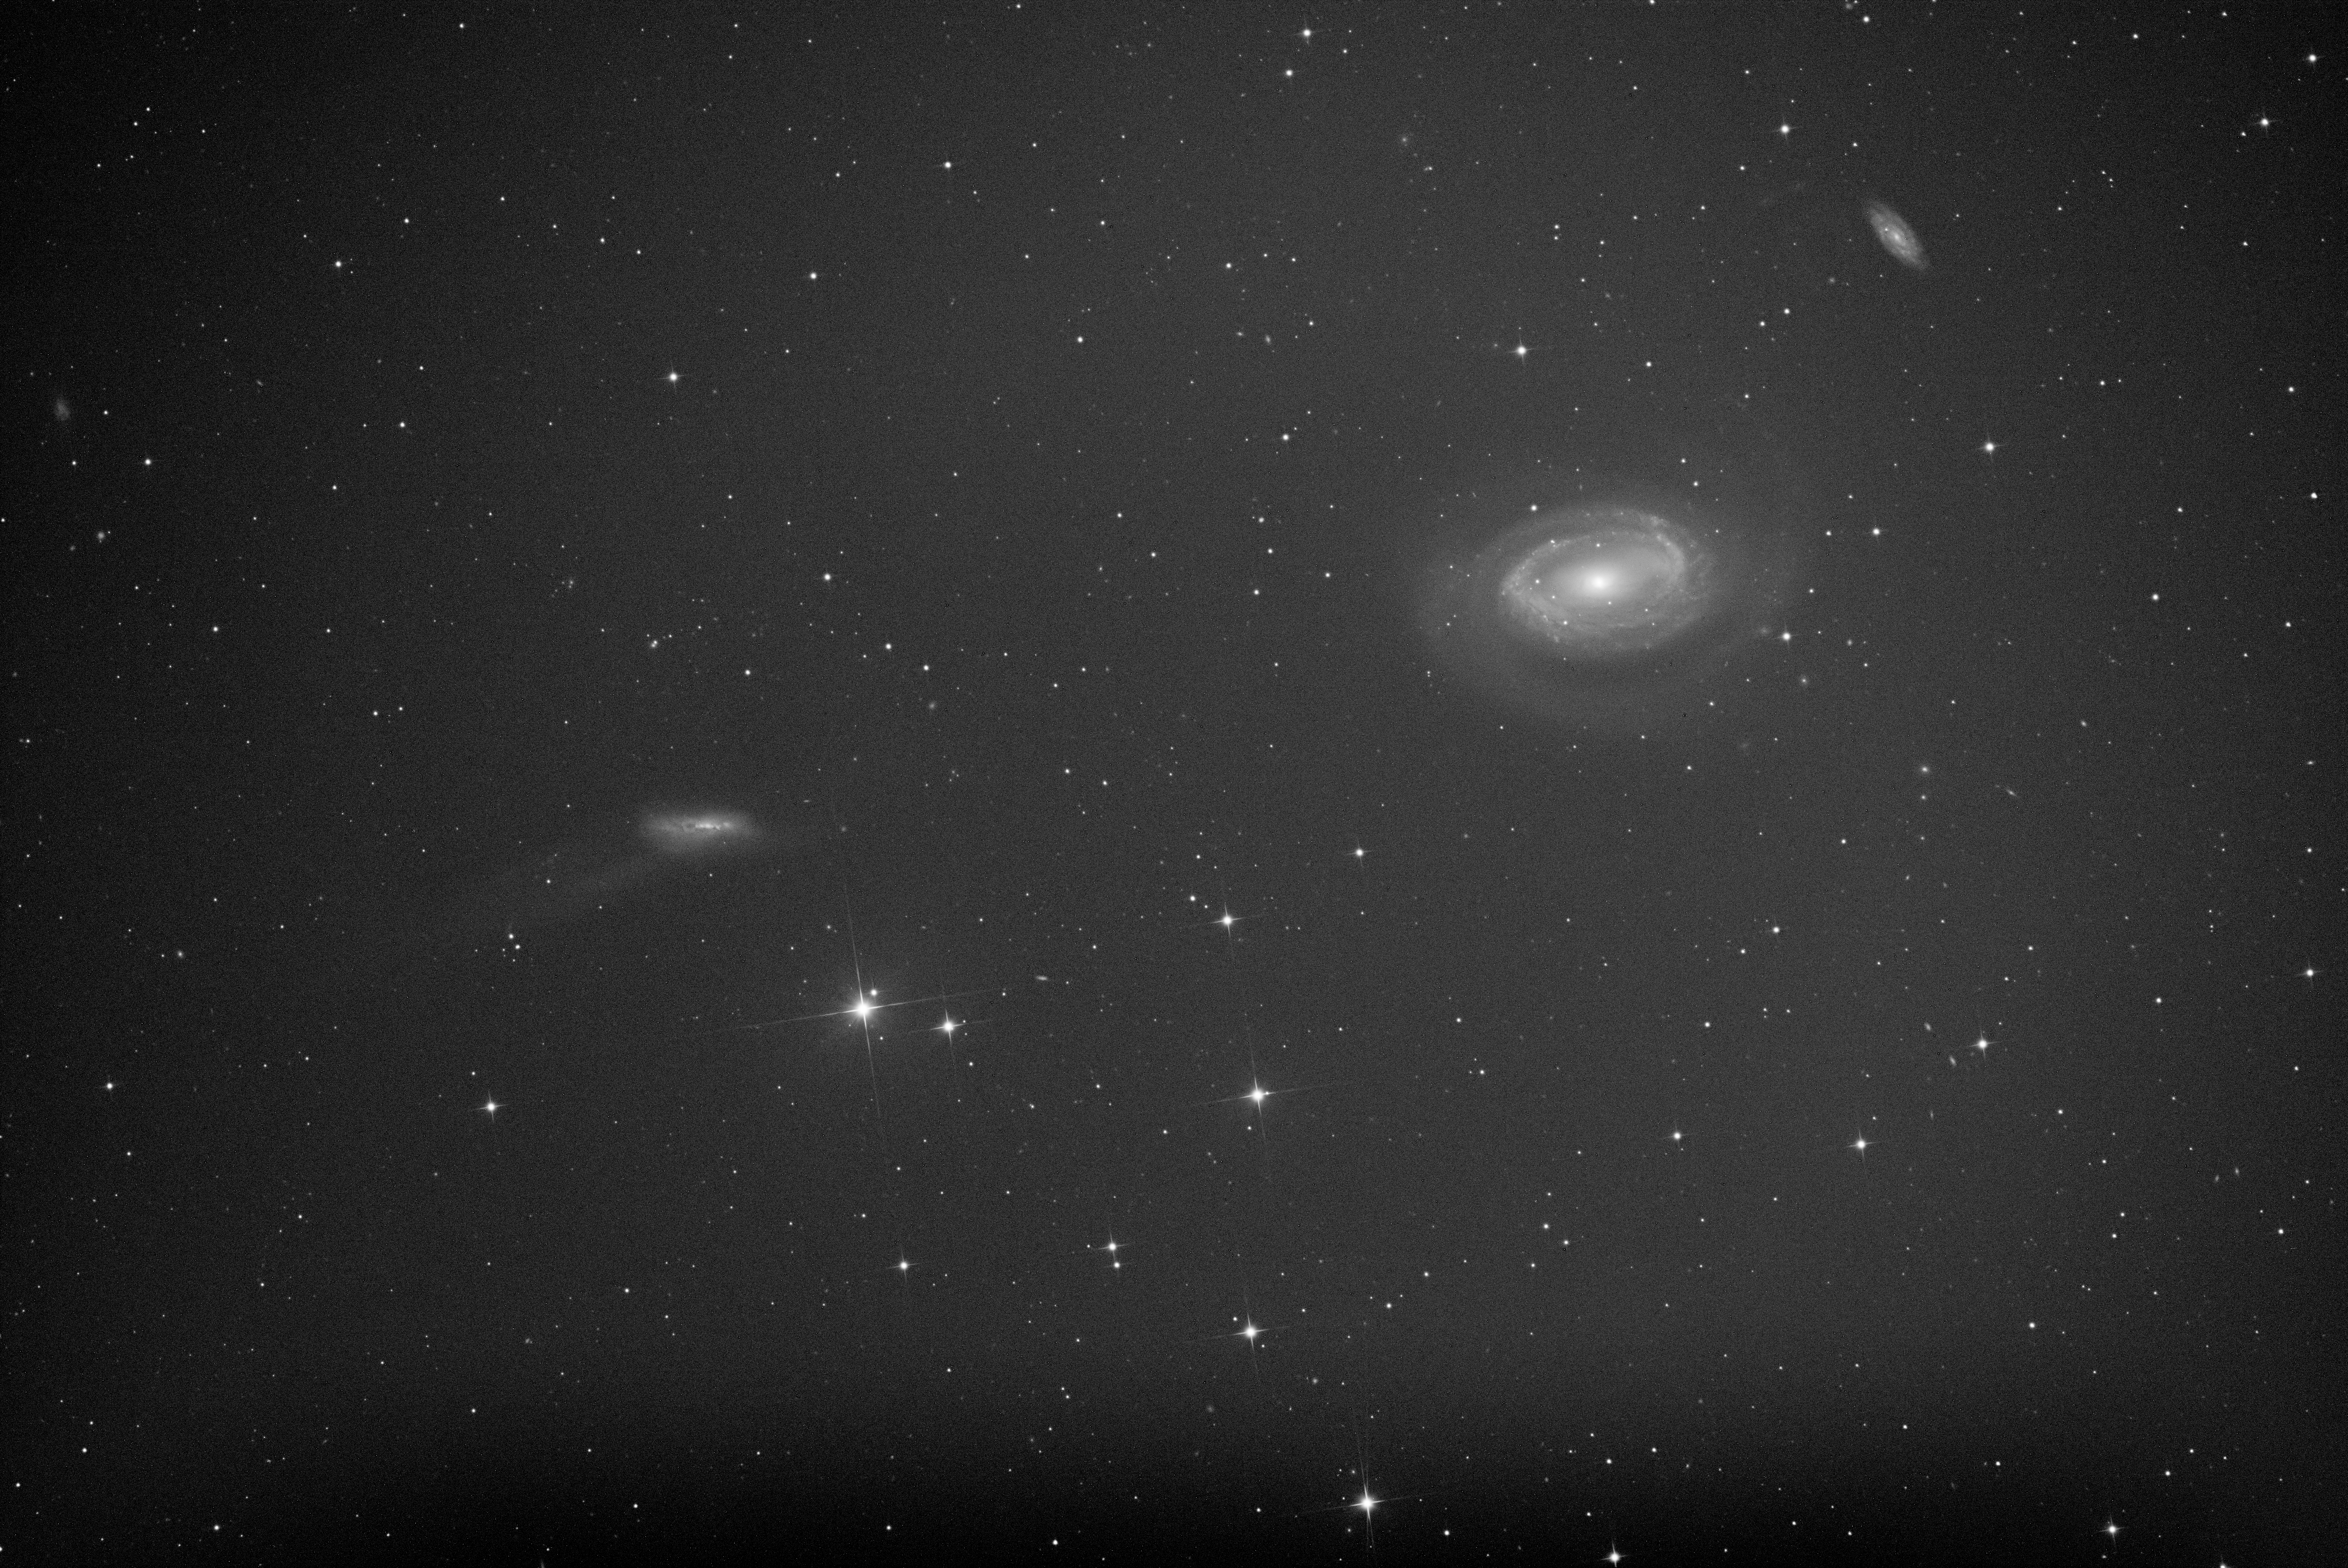
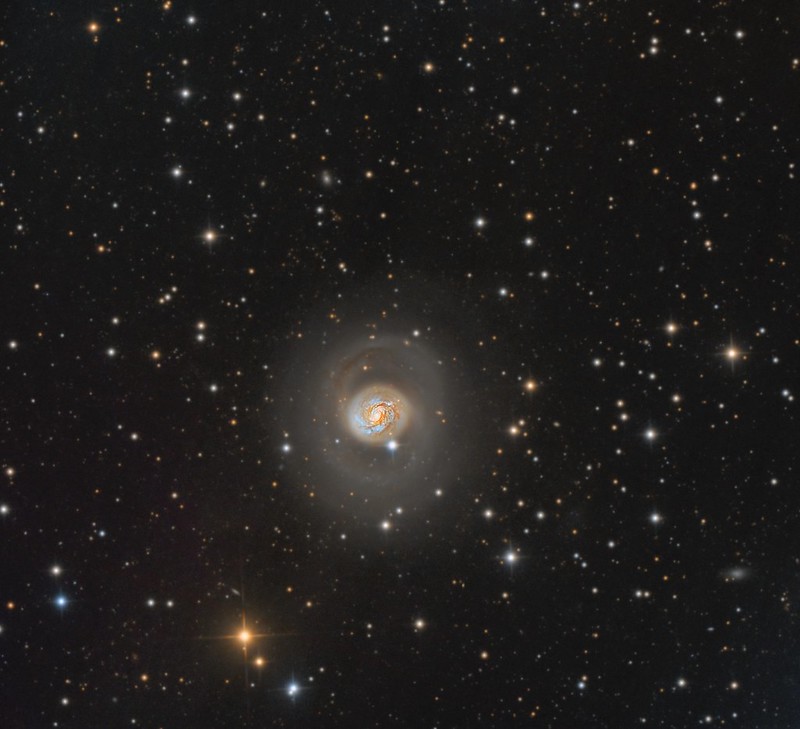
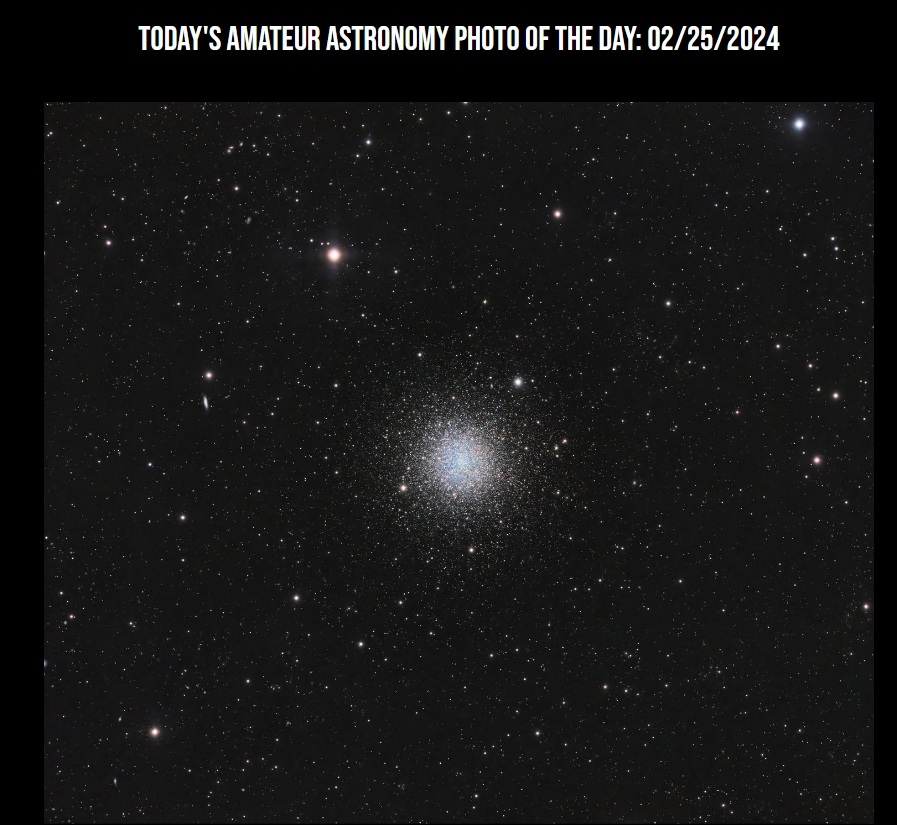
Above is a first light image of the globular cluster M3. I thought it was a good test because it’s all stars! A star cluster is very unforgiving. If you have any issues with tracking or guiding it will be immediately obvious. I am very pleased with the performance of this rig. As you can see the star images are very good. I am able to guide easily up to 10 minutes or more with no significant errors. The guide error seems to be consistently around 0.5 arc sec. The above image consisted of 41 x 5 minute exposures.
A few notes on M3 itself:
The globular cluster M3 was the first object in the Messier catalog to be discovered by Charles Messier himself. Messier spotted the cluster in 1764, mistaking it for a nebula without any stars. This misunderstanding of M3’s nature was corrected in 1784 when William Herschel was able to resolve the cluster’s individual stars. Today it is known to contain over 500,000 stars.
M3 is notable for containing more variable stars than any other known cluster. The brightness of a variable star fluctuates with time. M3 contains at least 274 variable stars.
Interestingly, M3 is actually larger in size than the well known Great Cluster M13 in Hercules. M3 is estimated to be 180 light years in diameter vs M13 about 120. However M3 is 10,000 light years more distant than M13. Both clusters are very old, about 11+ billion years.
And finally is there anything else I learned about the “ultraportable” platform. Of course! I would say these are the most important things:
- There are mini pcs which can run off 12 volt power. In fact I am using one in one of my remote rigs. This would enable you to lose at least one of the adaptor power bricks and thereby lighten things up.
- It’s important to respect the weight limits of these. If you load things up to even slightly less than the maximum weight, performance will be affected adversely. Be very conservative and make sure you’re not closer than even 4-5 pounds to the max weight.
- Polar alignment is critically important. The better polar alignment you have, the better your guiding and tracking will be.
- I did struggle for a few months with this before getting anything consistently acceptable. The breakthrough occurred when I changed from using a separate guide scope to what is shown here, namely the OAG or off axis guider. There was no way to solidly mount the guide scope. I tried several methods none of which worked, It’s also very important to make sure if you are using a separate guide scope that it is a proper match for your telescope. The formula to figure minimum guider focal length is (again for all amateur astronomers out there!): 0.2 x Guide camera pixel size in microns x telescope focal length divided by imaging camera pixel size.
- I was recommended the carbon fiber tripod as a good match for the RST. It’s max weight capacity is over 50 pounds but it’s not the most stable platform out there. I found hanging off that additional 15 pounds makes a huge difference.
- The other item I struggled with was figuring out how to get this telescope to point to objects in the sky accurately. At first I based my approach on previous experience I had with the 10 Micron mount which at first glance has similar features in the sense that you have a handpad that has a built in alignment process using 6 stars. This star alignment process saves the results internally in the mount kind of like the 10 Micron. The problem is that for imaging, 6 stars is not nearly enough! If you go through the process manually it takes forever and then you find out it’s not accurate enough. I decided to try an alignment process external to the mount and used also something I have experience with which is T-point from the The Sky X (Software Bisque). You can model as many points as you wish. For this mount I typically do around 60 points. That solved the pointing accuracy problem!
Anyway that’s all for now! Looking forward to more images with this “ultraportable” set-up.
Thanks for reading!
DrDave