One of the things a lot of people don’t realize is that you can have the most optically perfect telescope in the universe but chances are you will never realize that potential as long as you are Earthbound! Imagine lying at the bottom of a swimming pool looking toward the surface, let’s say 8-10 feet above you and trying to see the pattern on someone’s bathing suit who is floating on the surface of the water. Practically impossible unless there is literally no wave movement in the water between you and the swimmer! That is the quandry earthbound astronomers have to deal with, namely “astronomical seeing” Because we have an atmosphere above us which swirls and twirls with turbulence, jet streams etc , the result is twinkling and blurring of astronomical objects. This is why ground based observatories are located on mountain tops. Now “seeing” can be measured. When starlight travels through the atmosphere it goes from being a point of light to a disk of light. The larger the disc, the worse the seeing. The disc of light when plotted on a graph of width vs intensity has a shape shown in the diagram below. The astronomical measurement. The “full width at half maximum” of the optical intensity of the seeing disc is the most common measurement of astronomical seeing. This is the best angular resolution that can be achieved under your current conditions. Typically measured in arc seconds which is the standard angular unit in astronomy, the theoretically best possible seeing you can have on Earth is probably around 0.5 arc seconds and can only occur in places like Mauna Kea on the Big Island of Hawaii, the Atacama Desert in Chile and a few others. Here in Mayhill , New Mexico, we supposedly have really great seeing. I mean New Mexico Skies in all there promotional ads boasts of 1+ arc second seeing regularly. Since setting up my equipment here at Orion’s Belt which is literally a stone’s throw from New Mexico skies, I have been very curious about this. So far with my larger optical set-up I have not yet seen that amazing seeing they are claiming! Could it be that it really is better just across the street? Or maybe global warming has changed the climate here? Or maybe they are just full of it and perhaps it is not as good as they say. Or maybe my set up is not optimized to take advantage of the seeing. Maybe there is a tracking glitch or my mirror isn’t cooled down close enough to the ambient temperature or there is wobble in the pier or thermal effects from the observatory floor. So many variables to sort out it makes your head spin. That’s why I decided to resolve these questions by using a “seeing monitor”.
Seeing monitors have been around for as many years as professional observatories. Most professional observatories use the Differential Image Motion Monitor (DIMM) technique to measure seeing. This technique is implemented in hardware by using a two hole mask over an 8 to 11 inch Schmidt-Cassegrain telescope aperture, and measuring the root mean square (rms) fluctuation of the spacing of the two spots seen when a bright star is imaged a little bit out of focus with a fast camera. The reason two spots are measured is that the aggregate motion of the two spots due to poor tracking or wind vibration can therefore be rejected. However, the resulting system is complicated to automate, and invariably requires an automated enclosure to house the telescope as well, running the total cost up to many thousands of dollars. Amateur seeing monitors typically use a fixed single aperture system staring at Polaris, mounted on a heavy solid base. This way the wind motion and tracking error is gone. Polaris does move across the space of a measurement, so the linear drift of the centroid of Polaris’s position is determined and corrected. We call this the SIMM technique. Very smart people have developed software to interpret the data from these monitors and calculate the seeing. My set up employs a basic amateur ccd camera mounted on a metal base. This is a QHY 5L-II camera, a 1.2 Megapixel MT9M034 CMOS with exceptionally high (74%) QE and exceptionally low (~5e-) read noise. A 100MM F 3.5 is mounted onto the camera. Just to get a sense of where I was at with seeing vs what kind of imaging results I was getting I decided to mount the monitor on my AVX mount which I felt was stable enough for a test, plus I could more easily locate Polaris in the field of the camera. The Clear Sky Clock was forecasting average seeing conditions. Once I installed the camera and software, I started running the monitor over a period of several hours while at the same time continuing my current imaging project with the 16” scope. I was able to compare the results of my individual frames with the seeing recorded at the time the images were taken. The seeing results can be seen below. My images can be read by a program which can tell me the average full width half max values of the stars in the image. Basically what I discovered is that for that particular evening there was a range of seeing conditions which started actually pretty good, then declined and recovered a bit later. My images reflected almost exactly the changes in the seeing conditions and I was relieved to see that when the seeing was good, the image results were not far off from the local seeing conditions, maybe a half arc second on average. The imaging result is going to be affected by your system tracking, flexure of your optics etc so you have to expect a small degradation in the fwhm number. I would say 0.5 arc second above the local seeing is pretty good for a large amateur optical set up. Overall I would say the first test was a good one! I don’t think I have to sell everything and move or give up on my own set up. Not yet anyway!
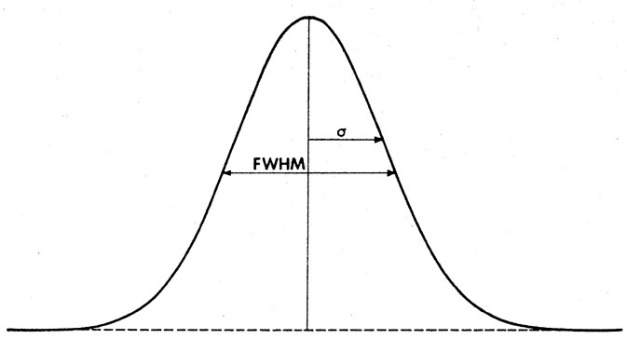
This is the standard astronomical seeing measurement called “Full width at half maximum or FWHM” and is an angular measurement of the disc of the star at half the peak intensity
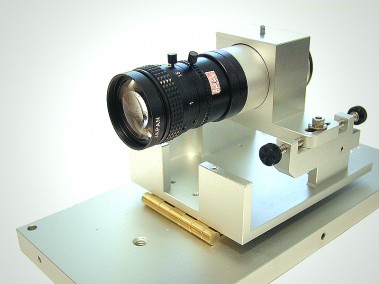
The “Seeing Monitor” is actually an astronomical ccd camera housed in a stable platform with a 100mm lens screwed on it.
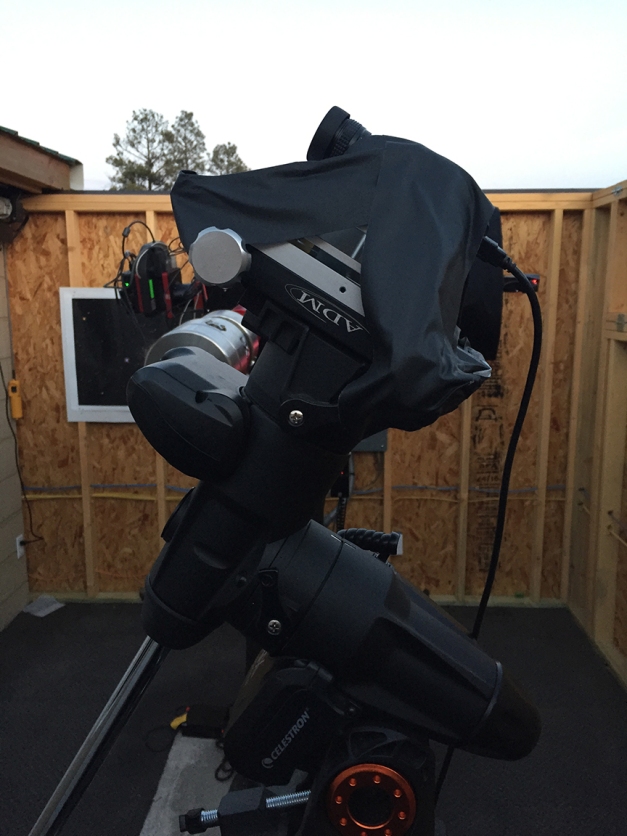
Here is the monitor taped onto my AVX mount! It enabled me to point to Polaris fairly easily
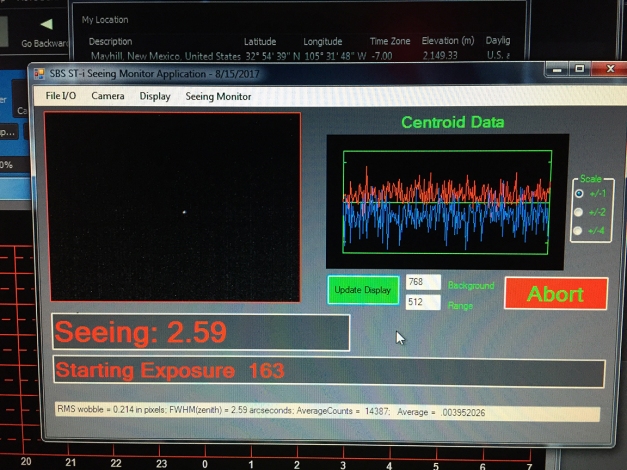
And now the moment we have been waiting for! This is the seeing monitor live program which takes a series of 0.01 sec exposures of Polaris, which you can see in the capture window, and over a series of exposures the seeing can be calculated. This is maybe slightly better than average suburban seeing which is by my experience 2.5 – 3 arc seconds

The seeing graph generated over the evening’s imaging session. The FWHM is in white. The blue is what is called “Polaris counts” which is a brightness reference and tells you how clear the visibility was based on the optimal value of 5. You can see the seeing was average at best but this was only one night of testing. More to come!
Thanks for reading!
Dr Dave


